Struggling to do a pull-up? You’re not alone—pull-ups test strength, control, and patience. This pull-up program for beginners will guide you step-by-step to your first successful rep in just four weeks.
Keep reading; it’s simpler than you think!
Key Takeaways
- Pull-ups build upper body strength, targeting lats, biceps, core, and grip. Chin-ups focus more on biceps and chest.
- Inverted rows, resistance bands, and eccentric pull-ups are key for building strength toward unassisted pull-ups.
- The 4-week program starts with assisted exercises. It progresses weekly with added intensity and fewer assistance tools over time.
- Core strength and lower traps are crucial for pull-up success. Dead hangs, face pulls, planks, and scapular pull-ups help improve these areas.
- Consistency is essential—train 2–3 times a week while focusing on form to safely reach your first full pull-up by Week 4!
Pull-Up Basics
A pull-up is a classic upper-body move that builds serious strength. It targets your back, biceps, and core, making it a powerhouse exercise.
Difference Between Pull-Ups and Chin-Ups
Pull-ups and chin-ups differ in hand position. Pull-ups use a pronated grip, with palms facing away from the body. Chin-ups use a supinated grip, where palms face toward your chin (think of scratching your chin).
This small change shifts which muscles do most of the heavy lifting.
Pull-ups target upper back muscles like lats and traps more intensely. Chin-ups rely more on biceps and chest for strength. Both exercises build solid pulling power but challenge muscle groups differently.
Muscles Worked During Pull-Ups
Pull-ups target multiple muscles in the upper body. The Latissimus Dorsi, or lats, is the main muscle doing most of the work. These are your largest back muscles and help with pulling motions.
The biceps also get a good workout as you bend your elbows to pull yourself up.
Smaller stabilizing muscles assist too. The Infraspinatus and Lower Trapezius keep your shoulder blades steady during movement. Your core plays a key role by engaging for balance and control, including the External Obliques and Erector Spinae along your lower back.
Even the Pectoralis Major in the chest helps out slightly, making it an effective full-upper-body exercise!
Key Benefits of Pull-Ups
They build upper body strength like no other exercise. Your lats, shoulders, and biceps work hard during every pull-up. This workout also activates your core muscles, giving you extra stability.
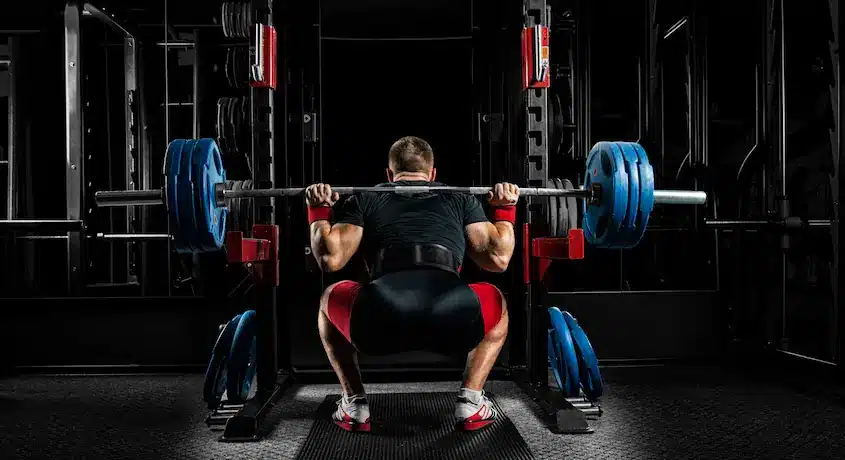
Pull-ups strengthen your grip, which helps with deadlifts or carrying weights. They are a key move in any progressive overload plan for muscle growth and stamina. Stronger back muscles reduce shoulder pain and lower injury risks too.
Next up: Preparing for Pull-Ups!
Preparing for Pull-Ups
Getting ready to pull up starts with nailing the fundamentals. Strengthen your grip, build pulling power, and focus on controlled movements for steady progress.
Establishing Proper Grip
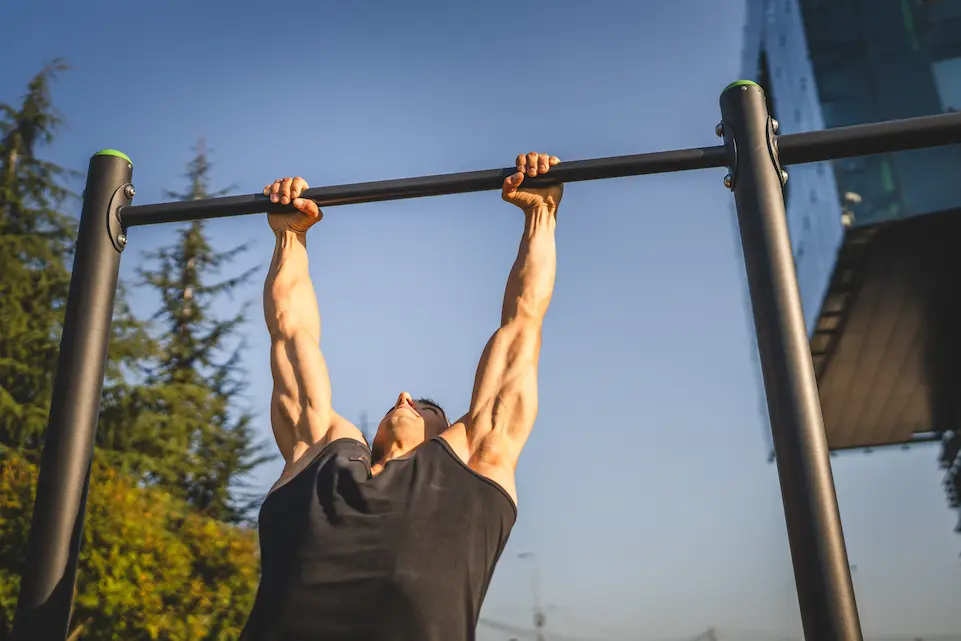
Grip the pull-up bar with a pronated grip, palms facing away. Place your hands slightly wider than shoulder-width apart. A good grip starts by wrapping your thumbs around the bar for control and safety.
Begin from a dead hang position, arms fully extended.
Engage your scapula by retracting and depressing your shoulder blades. This small adjustment protects the shoulder joints and activates key muscles like the lats and traps. As fitness expert Bret Contreras says:.
Proper form is everything—it’s not just about pulling yourself up; it’s about doing it right.
Strong grips set you up for success with inverted rows next!
Building Initial Strength with Inverted Rows
Building strength for pull-ups starts with inverted rows. This exercise makes pulling motions easier and prepares your body for the pull-up bar.
- Set up a barbell at waist height or lower. Use a squat rack, smith machine, or any stable surface.
- Lie under the bar with your chest facing up. Keep legs bent and feet flat on the ground.
- Grab the bar with an overhand grip, slightly wider than shoulder-width. A firm grip helps avoid slipping.
- Straighten your body in a plank-like position. Engage your core to keep steady and avoid sagging hips.
- Pull your chest toward the bar slowly while keeping elbows tight to your sides. Aim for smooth movement without jerking up.
- Lower back down in control until arms are straight again. Focus on slow descents to build strength faster.
- Start with 8–10 repetitions per set, completing 2–3 sets each session. Gradually add more reps as you gain power.
- Raise your feet onto a bench by Week 3 of training for added difficulty, targeting new muscle fibers.
- Avoid rushing through reps or flaring elbows outward—form matters more than speed here!
Using Resistance Bands for Assistance
Pull-ups can feel tough when starting. Resistance bands make them easier by cutting some of the work for your muscles.
- Attach a resistance band to the pull-up bar securely. Use one strong enough to support you without snapping.
- Place one foot or both knees in the looped band. Adjust based on preference and comfort.
- Grip the pull-up bar with your palms facing away from you, shoulder-width apart. This grip targets your lats and upper back muscles.
- Keep your core tight as you begin pulling yourself up. Let the band help lift part of your body weight.
- Lower yourself slowly after each rep to build strength in the “negative” phase of the movement.
- Choose a resistance level that allows 8-10 tough reps per set, focusing on proper form over speed.
- Reduce band thickness weekly if possible, aiming for gradual improvement toward unassisted pull-ups.
- Track progress using videos or notes—seeing results can boost motivation!
The 4-Week Beginner Pull-Up Program
This 4-week plan breaks down each step, making pull-ups less of a monster and more of a goal you can crush.
Week 1: Two Training Days
Start building strength with two training sessions in Week 1. Focus on form and control over speed or heavy resistance.
- Warm up before each session for 5-10 minutes. Use light cardio like jogging. This preps your muscles and prevents shoulder injuries.
- Begin with inverted rows using a barbell set low on a squat rack. Perform 3 sets of 8-10 reps. Maintain core strength while pulling up your chest to the bar.
- Practice isometric exercise by holding your body at the top of an assisted pull-up for 5 seconds. Do this for 4 reps, taking short breaks in between.
- Use a resistance band to assist with pull-ups if needed. Aim for 2 sets of controlled movements, doing as many reps as possible without overexertion.
- Cool down after your workout with shoulder retraction stretches or a light lat pulldown using minimal weight to relax your shoulder girdle.
Train on non-consecutive days, such as Monday and Thursday, allowing recovery time in between sessions for optimal progress!
Week 2: Three Training Days
It’s time to step up from Week 1. Adding an extra training day will boost your strength and confidence for pull-ups.
- Warm up for 5-10 minutes. Use jumping jacks, push-ups, or press ups to get moving. This prepares your body for harder work.
- Perform 3 sets of band-assisted pull-ups. Aim for 8-10 challenging reps per set. Pick a resistance band that supports you but still makes you work hard.
- Do inverted rows using a barbell row setup or TRX straps for 3 sets of 10 reps each. Focus on pulling your chest to the bar and engaging your back muscles fully.
- Work on eccentric pull-ups by lowering yourself slowly from the top position of the bar. Do this 5 times per set, completing 2 sets total.
- Add core strength exercises like planks or hanging leg raises for at least 30 seconds each round. Do these twice to strengthen your belly muscles.
- End with shoulder-friendly exercises like face pulls or rotator cuff stretches to prevent impingements and pain later on.
- Rest for at least one day between sessions during this week to let muscles recover before the next workout session!
Week 3: Three Training Days with Progression
Progress is crucial during the third week of this program. You’ll increase intensity while sticking to three training days.
- Start with dynamic stretches. Focus on your shoulders, arms, and back muscles to avoid strain or shoulder impingement.
- Keep using resistance bands if necessary. Select a band that provides a slightly greater challenge than Week 2 to push yourself further.
- Perform 3 sets of assisted pull-ups for 6-8 reps each time. Emphasize full range of motion and controlled movements.
- Incorporate eccentric pull-ups after your assisted ones. Lower yourself slowly from the bar for 5 seconds per rep, completing 3-5 repetitions per set.
- Build core strength by incorporating planks between sets. Hold each plank for 30 seconds to stabilize your body during workouts.
- Strengthen your lower traps with face pulls or rows using light weights or cables. Aim for 12-15 reps in 2 sets as supporting work.
- End with isometric holds at the top of the bar for 10-20 seconds per attempt. Rest well between these efforts to sustain proper form.
- Add squats as part of your session for comprehensive strength development, performing 3 sets of 10 reps with appropriate weight load.
Week 4: Three Training Days and First Pull-Up Attempt
This is the final week of your beginner pull up program. It’s time to push hard and aim for that first pull-up.
- Start each training day with a warm-up. Use dynamic stretches, arm circles, and light exercises to loosen up muscles.
- Perform three sets of assisted pull-ups. Use a resistance band or a partner for help. Stick to 6-8 reps per set.
- Include eccentric pull-ups in your routine. Slowly lower yourself for 5-10 seconds after jumping up to the bar.
- Strengthen your core with planks or hanging knee raises for 30-60 seconds each set.
- Practice isometric holds at the top position of the bar. Hold yourself up as long as possible, aiming for 5-10 seconds.
- On Day 3, attempt your first unassisted pull-up. Start fresh, focus on form, and engage all muscles.
- If you can’t complete one yet, don’t stress! Retry using less assistance every week until you succeed!
Progression Tips
To get stronger, focus on areas holding you back. Small changes in your routine can make a big difference over time.
Improving Weak Areas (Core and Lower Traps)
A strong core and lower traps are key for pull-ups. Weakness in these areas can slow progress, so targeting them is essential.
- Do Long Lever Rocking Planks for core strength. Extend your legs fully while holding a plank position. Rock forward and backward slowly to engage your abs deeply. Aim for 3 sets of 30 seconds, twice a week.
- Practice Scapular Pull-Ups on a pull-up bar. Hang from the bar with straight arms, then shrug your shoulders down and back. This activates your lower traps effectively. Perform 10-12 reps each session.
- Add Dead Hangs to improve grip and shoulder stability. Simply hang from the pull-up bar for as long as possible, keeping your muscles tight. Start with 3 sets of 20-30 seconds.
- Incorporate Isometric Holds to build static strength in weak zones. At the top of an assisted pull-up, hold the position for 5-10 seconds before lowering.
- Strengthen with Face Pulls using cables or resistance bands. Focus on squeezing your shoulder blades together at the end of each rep for maximum trap activation.
- Finish with Back Extensions for balanced core strength. Lie face down on a bench or mat, lift both chest and legs off the ground slightly, then return slowly.
Incorporating Eccentric Pull-Ups
Building strength for pull-ups takes focus and patience. Eccentric pull-ups are a proven way to boost your progress.
- Start at the top of the bar using a step, jump, or assistance. Aim for your chin to be above the pull-up bar.
- Lower yourself slowly and with control. Take about 5 seconds to descend fully until your arms are straight.
- Perform 5 sets of these, keeping each descent steady. Rest for 1-2 minutes between sets.
- Engage your muscles as you lower down. This helps strengthen the back, arms, core, and grip needed for pull-ups.
- Use isometric holds if lowering feels too fast or shaky. Pausing mid-descent can help build even more control.
- Incorporate this exercise into your pull up workout plan twice per week. Consistency is key to progress.
- Track improvements over time by reducing assistance or increasing hold times during descents.
Eccentric movements challenge both beginners and advanced gym-goers alike!
Pull-Up Alternatives for Beginners
Not ready to tackle a full pull-up yet? These beginner-friendly moves will build strength and boost confidence, step by step.
Assisted Pull-Ups
Assisted pull-ups are a game-changer for beginners. Use a resistance band to help reduce your body weight while training. Simply loop the band around the pull-up bar and place your knee or foot into it.
The band’s stretch provides extra lift, making it easier to learn the movement. This method builds strength and confidence as you work toward unassisted reps.
Many gyms have assisted pull-up machines if bands aren’t an option. These machines use counterweights to lighten the load, similar to resistance bands. Aim for 3-4 sets of 8-10 reps in Week 2 of your program.
Adjust the assistance as you build strength over time—less help means more gains! Keep pushing yourself but focus on form first; improper technique slows progress.
Australian Pull-Ups
Unlike assisted pull-ups that use bands or machines, Australian pull-ups rely on body weight and a bar set at waist height. These target your back, arms, shoulders, and core. They’re easier than full pull-ups but still challenging.
To do one, grip the bar with palms facing away. Keep your body straight like a plank as you hang under the bar with feet on the ground. Pull your chest to the bar by squeezing your shoulder blades together.
This move is great for beginners learning how to learn to do a pull up. It prepares muscles for harder variations like chin ups or regular pull ups on a higher pull-up bar. It can also help build endurance without overloading joints.
If you’re struggling with form, try bending your knees slightly for added control.
Conclusion
Your first pull-up is closer than you think. This 4-week guide focuses on steady practice, core strength, and proper technique. Stick to the plan, stay patient, and watch your progress unfold.
Pull-ups might be tough now, but soon they’ll feel like second nature. Start strong—your journey begins today!
FAQs
1. How can beginners learn to do a pull-up?
Beginners can start by using isometrics, like holding themselves up on the pull-up bar as long as possible. Focus on building strength and conditioning with simple exercises, such as flexed-arm hangs or assisted pull-ups.
2. What equipment is needed for this 4-week program?
You’ll need a sturdy pull-up bar and basic tools like resistance bands or a dip belt for added weight later. These help adjust difficulty based on your progress.
3. Should I work with a personal trainer to follow this guide?
A personal trainer isn’t required but can be helpful if you want guidance or proper form checks. If going solo, pay close attention to technique to avoid injuries.
4. Can I improve strength without doing full pull-ups yet?
Absolutely! Use flex holds, negatives (lowering yourself slowly), and other strength-building moves to prepare your muscles for full pull-ups over time.