
Are you an aspiring athlete looking for a way to boost your performance on the field? Everyone knows that practice and dedication are key, but adding mobility exercises can provide an extra edge.
Mobility training helps improve your range of motion for more dynamic movements and reduces soreness and injury risk while increasing confidence and agility.
Let’s dive into some of the best mobility exercises any athlete can perform:
Effective Mobility Workout For Athletes
Let’s take a look at some of the most dynamic mobility exercises for athletes (from beginner to advanced level athletes):
1. Pigeon Pose
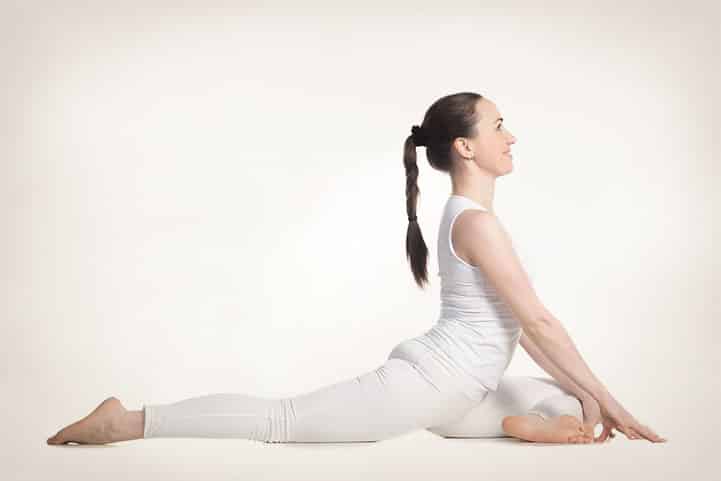
Step-By-Step Guide
- Start by coming onto all fours in a tabletop position, with your hands directly under your shoulders and your knees under your hips.
- Slide your right knee forward and place it behind your right wrist. Your right foot should be angled slightly towards the left side of your mat.
- Extend your left leg straight back behind you, making sure your left hip is aligned with the left knee and is pointing down towards the mat.
- Your right shin may not be parallel to the front edge of the mat at first, and that’s okay. Gradually work towards having your shin more parallel over time, but don’t force it.
- Square your hips as much as possible to the front of the mat. The goal is to have both hip points facing forward.
- Once you feel stable, you can either stay upright, place your hands on the mat for support, or fold forward over your right leg.
- In the forward fold, walk your hands forward and lower your chest towards the floor. You can rest on your forearms, or if it feels comfortable, rest your forehead on the mat.
- Keep your neck relaxed and breathe deeply in this position.
- Hold the pose for 1 to 2 minutes, or as long as it feels comfortable for you.
- To release the pose, push through your hands, engage your core, and slowly bring your left leg back, coming back into the tabletop position.
Benefits of Pigeon Pose
- Hip Flexor Stretch: Pigeon pose is one of the best mobility workouts as it deeply stretches the hip flexors of the front leg, which can benefit those with tight hips or people who sit for extended periods.
- Deep Glute Stretch: It targets the piriformis and other deep gluteal muscles, which can help alleviate sciatic pain and improve overall hip flexibility.
- Improves Posture: By releasing tension in the hips, it can also help improve posture and alleviate lower back discomfort.
- Stimulates Abdominal Organs: The forward fold in this pose can gently massage the abdominal organs and improve digestion.
Mistakes to Avoid
- Overarching the Back: Avoid arching your lower back excessively in this pose, as it can strain the lumbar spine. Instead, engage your core to maintain stability and protect your back.
- Putting Too Much Weight on the Bent Knee: Distribute your weight evenly between both hips and avoid putting excessive pressure on the bent knee. If you feel discomfort, use props like a block or a cushion under the hip for support.
- Collapsing the Front Shin: Your front leg should ideally be at a 90-degree angle. Avoid letting the shin collapse inward, as this can cause strain on the knee. Work on gradually squaring the hips to maintain alignment.
2. Cat-Cow Stretch
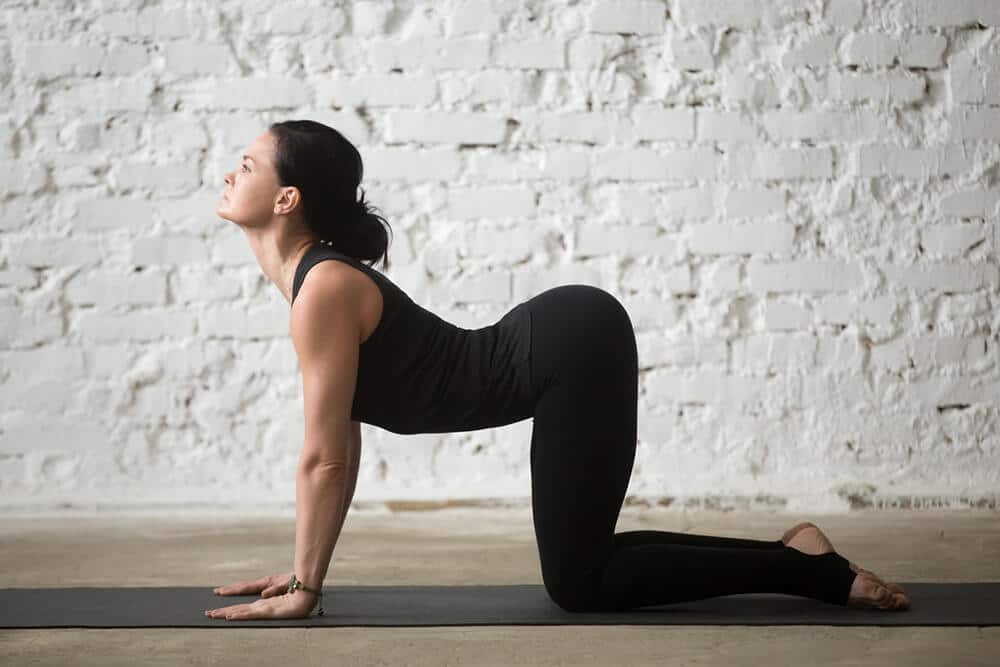
Step-By-Step Guide
- Start by coming onto all fours in a tabletop position, with your hands directly under your shoulders and your knees under your hips.
- Find a neutral spine position, with your back flat and your head aligned with your spine.
- Cow Pose (Bitilasana): Inhale deeply as you arch your back, lifting your sitting bones and sternum towards the ceiling. Allow your belly to sink towards the floor, creating a gentle backbend.
- Cat Pose (Marjaryasana): As you exhale, round your back like a cat, tucking your chin towards your chest. Draw your belly button towards your spine, engage your core, and tilt your pelvis to deepen the stretch.
- Flow smoothly between Cow and Cat Poses with each breath. Inhale to transition into Cow Pose and exhale to transition into Cat Pose.
- Continue this dynamic movement for at least 5-10 rounds, syncing your breath with the movement of your spine.
Benefits of Cat-Cow Stretch
- Spinal Mobility: Cat-Cow Stretch is a core mobility workout for athletes as it helps to improve flexibility and mobility in the spine, promoting a healthy range of motion.
- Relieves Back Tension: The alternating arching and rounding of the back can alleviate tension in the back and reduce stiffness.
- Stimulates Abdominal Organs: The movement of the spine in this stretch can massage and stimulate the abdominal organs, aiding in digestion and overall gut health.
Mistakes to Avoid
- Rushing the Movement: Avoid rushing through the Cat-Cow Stretch. Focus on the breath and move slowly and mindfully, allowing the spine to flex and extend with each breath gently.
- Overarching or Over-rounding the Back: While creating a noticeable arch and round in the back is essential, avoid exaggerating the movement, which could lead to strain or discomfort.
- Sinking into the Shoulders: Keep your shoulders away from your ears and engage your shoulder blades slightly to support your upper body throughout the movement.
3. 90/90 Stretch

Step-By-Step Guide
- Start by sitting on the floor or on a yoga mat with your legs extended straight out in front of you.
- Bend your right knee and place your right foot on the floor, bringing your heel close to your left hip.
- Now, bend your left knee and place your left foot on the floor, bringing your heel close to your right hip. Your left shin should be parallel to the front edge of the mat.
- Both knees should ideally be at 90-degree angles, with your right shin stacked on top of your left shin and your right knee stacked on top of your left knee. Your legs should form a square shape.
- If your knees are significantly elevated or if you feel discomfort in the hips, you can sit on a cushion or yoga block to ease the stretch.
- Sit up tall and lengthen your spine. You can place your hands on the floor behind you for support.
- Take a few deep breaths, relaxing into the stretch and allowing your hips to gently open.
- If you feel comfortable and want to deepen the stretch, you can slowly begin to fold forward at your hips, walking your hands forward on the floor. Only go as far as your body allows without straining or forcing the movement.
- Hold the stretch for about 30 seconds to 1 minute, breathing deeply and allowing your hips to release.
- To come out of the pose, slowly walk your hands back and gently extend your legs out in front of you.
Benefits of the 90/90 Stretch
- Hip Flexibility: The 90/90 stretch has to be on your list of top hip mobility exercise for athletes as it targets the external rotators of the hips and helps to improve hip flexibility and mobility.
- Hip Opening: It provides a deep stretch to the hips, particularly the glutes and piriformis muscles.
- Posture Improvement: Regular practice of this stretch can help alleviate tightness in the hip area, leading to improved posture and reduced lower back discomfort.
- Preparation for Advanced Poses: This stretch is an excellent preparatory pose for more advanced hip-opening yoga poses.
Mistakes to Avoid
- Over-rotating the Hips: Make sure both knees are stacked on top of each other and form a 90-degree angle. Avoid over-rotating the hips to maintain the proper alignment of the pose.
- Sitting on Uneven Surface: Ensure you’re sitting on an even surface to maintain balance and symmetry in the pose.
- Hunching the Back: Keep your spine tall and avoid rounding or hunching your back. Engage your core to support your posture.
- Neglecting the Breath: Remember to breathe deeply and mindfully throughout the stretch to enhance relaxation and promote a sense of calmness.
4. Russian Twist
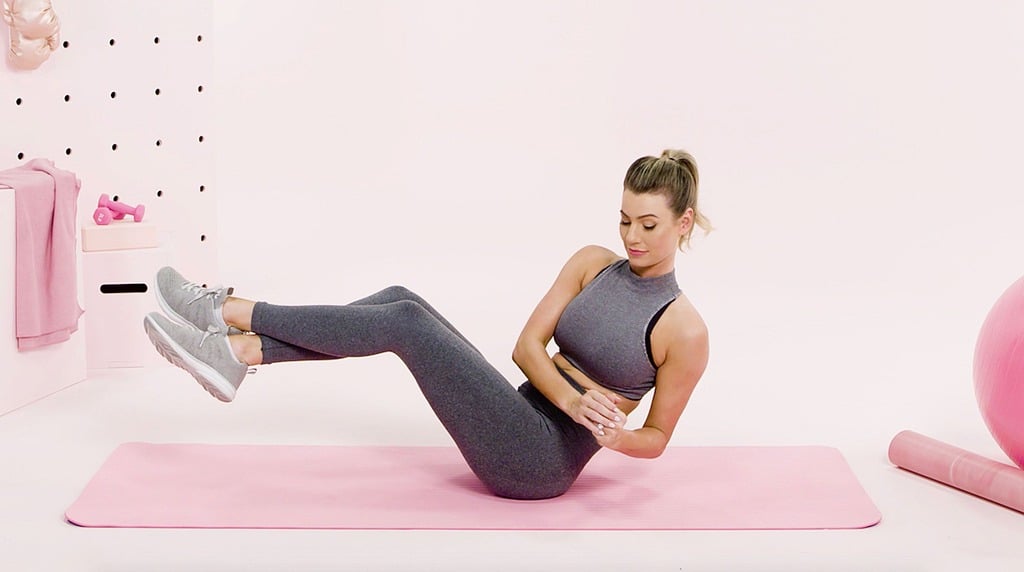
Step-by-Step Guide
- Sit on the floor with your knees bent and your feet flat on the ground. You can keep your feet together or lift them slightly off the floor to intensify the exercise.
- Lean back slightly to engage your core and create a V shape between your torso and thighs. Your back should be straight, and you should feel your abs working to support your upper body.
- Hold your hands together in front of your chest, or if you’re using a weight, hold it with both hands close to your body.
- Begin the movement by twisting your torso to the right side, taking the weight or your hands with you. Exhale as you twist.
- Pause for a moment at the right side, engaging your obliques.
- Inhale as you return to the center and then twist your torso to the left side, again pausing briefly at the left side.
- Continue this twisting motion from side to side in a controlled manner.
- You can touch the weight or your hands to the floor on each side for a more challenging variation before returning to the center.
Benefits of the Russian Twist
- Core Strength: The primary focus of this core mobility exercise for athletes is to strengthen the core muscles, particularly the obliques, which play a crucial role in the rotation and lateral movements.
- Improved Spinal Mobility: The twisting motion helps improve flexibility and mobility in the spine, promoting better range of motion.
- Stability and Balance: The Russian Twist engages the stabilizing muscles of the core, contributing to better overall stability and balance.
Mistakes to Avoid
- Using Momentum: Avoid swinging your arms or using momentum to twist from side to side. Focus on controlled and deliberate movements.
- Rounding the Back: Keep your back straight and avoid rounding your shoulders forward throughout this dynamic mobility workout. Maintain a neutral spine position throughout the exercise.
- Neglecting Breathing: Remember to breathe throughout the exercise. Exhale as you twist and inhale as you return to the center.
- Lifting the Feet too High: If you lift your feet off the ground, be mindful not to strain your lower back. Keep the movement controlled and within a comfortable range of motion.
5. Crunches
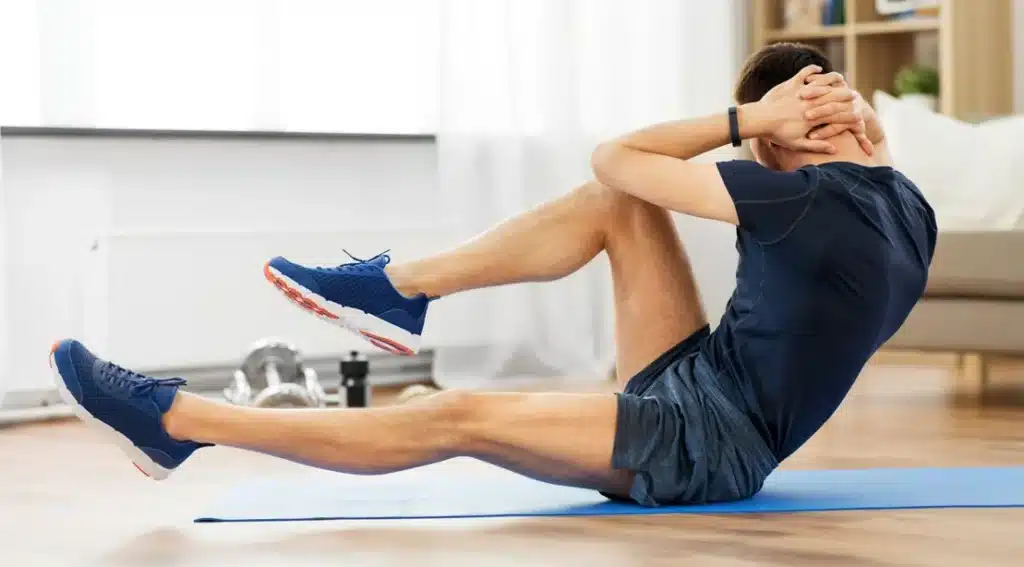
Step-By-Step Guide
- Lie flat on your back on a yoga mat or a comfortable surface. Bend your knees and keep your feet flat on the floor, about hip-width apart. You can place your hands behind your head, lightly supporting your neck, or cross your arms over your chest.
- Keep your lower back pressed gently into the floor to maintain a neutral spine. Avoid arching your back or pressing it too hard into the floor.
- Engage your core by drawing your navel towards your spine. This helps stabilize your torso during the movement.
- Start the movement by lifting your head, shoulders, and upper back off the floor. Use your abdominal muscles to initiate the crunch, not your neck or hands.
- Keep your chin slightly lifted, maintaining a space between your chin and chest to avoid straining your neck.
- Exhale as you come up and focus on contracting your abdominal muscles to lift your upper body off the floor.
- Pause briefly at the top of the movement, making sure to feel the tension in your abs.
- Inhale as you lower your upper body back down to the starting position in a controlled manner.
- Avoid letting your upper back completely touch the floor between repetitions to keep the abdominal muscles tense.
Benefits of Crunches
- Improved Posture: A strong core can support better posture and spinal alignment, reducing the risk of lower back pain.
- Increased Flexibility: Regularly performing crunches can improve flexibility in the spine and surrounding muscles.
- Functional Movement: A strong core is essential for many everyday activities and sports, enhancing overall functional fitness, and this mobility drill just does that.
Mistakes to Avoid
- Straining the Neck: Keep your neck relaxed and avoid pulling on it with your hands. The work should come from your abdominal muscles.
- Flaring Elbows: Keep your elbows wide and avoid pulling on your neck. This can help prevent neck strain.
- Holding Your Breath: Remember to breathe throughout the exercise. Exhale as you come up and inhale as you lower down.
Wind Up
Mobility exercises are an important part of any athlete’s training regime.
Whether you’re a professional or amateur athlete, employing mobility drills into your routine can help you regain range of motion, reduce pain and prevent injury.
So, if you need to reinvigorate your current training program, consider adding these aforementioned mobility exercises for athletes into your workout routine.
One last thing – don’t forget to have fun (and make sure to take some silly pictures along the way)! That being said – go forth and be flexible.
